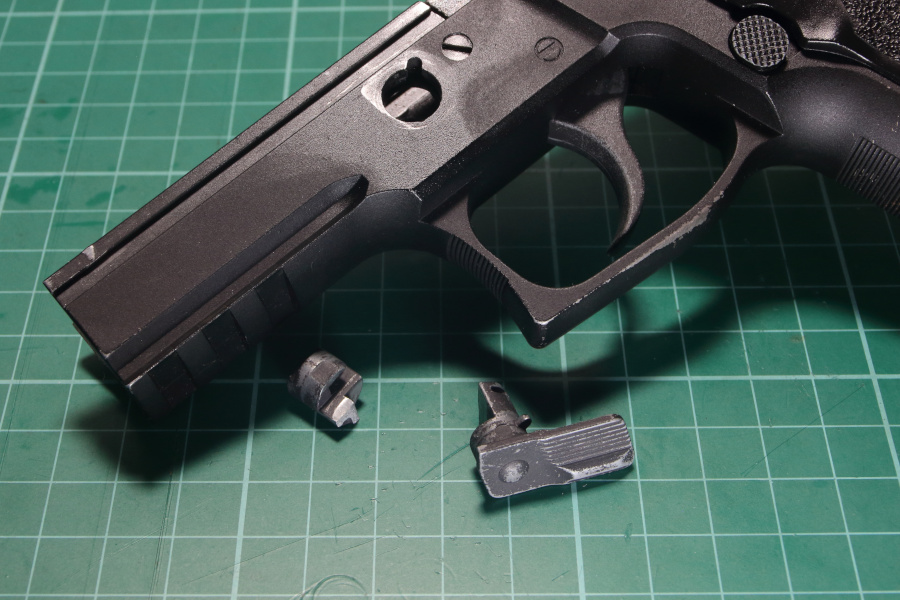
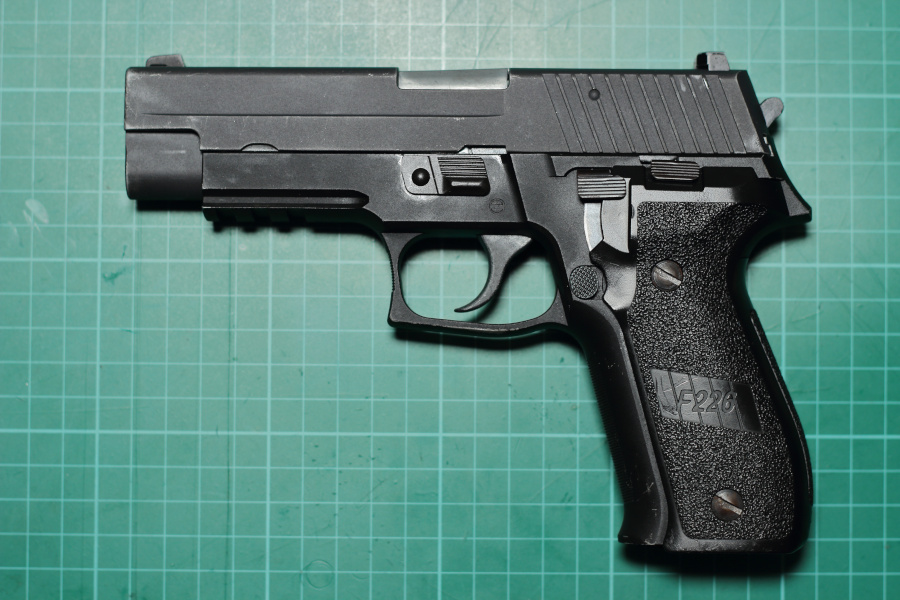
Welcome everyone to another airsoft repair related entry. In this article I will be installing a new takedown lever on my WE Tech F226 airsoft gas blow back pistol. I was doing a recoil impulse comparison between two P226 style airsoft gas blow back pistols I own, and it just so happened that the takedown lever on my WE Tech F226 gave out and split in half, hence this entry. This isn’t the first time something has broken on my WE Tech F226, but to be fair I’ve also had this airsoft sidearm for some time now.
Being a variant, rather than a clone, I had some concerns as to the options available to me for the repair. There was the obvious OEM replacement, but that just meant I’d have to deal with this part breaking again down the line, and I didn’t like that idea. Thankfully after looking at what’s available I was able to find a suitable replacement part.
I decided to also cover the repair process in a video for those who prefer it. Otherwise you can continue to scroll down past the video.
The Takedown Lever
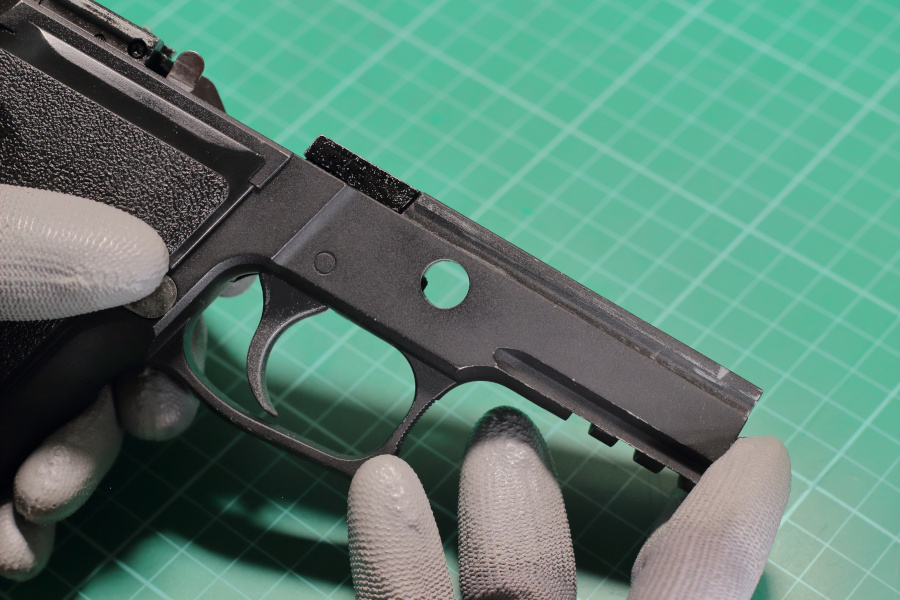
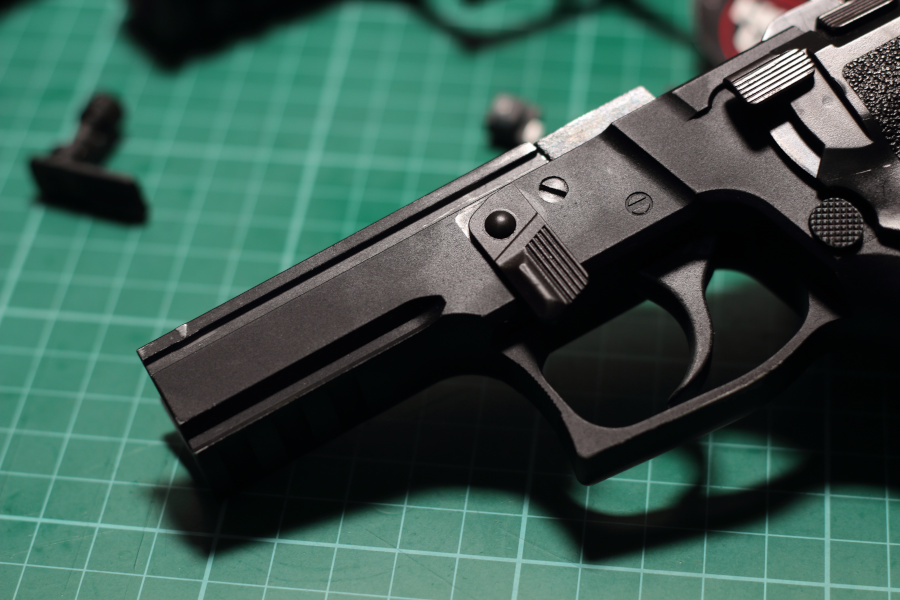
The function of the takedown lever, is to lock the upper half of the pistol together with the lower frame. A closer look at the locking mechanism reveals just why it broke. The take down lever is seated on two ends of the width of the lower frame, and is in essence, floating at the middle.
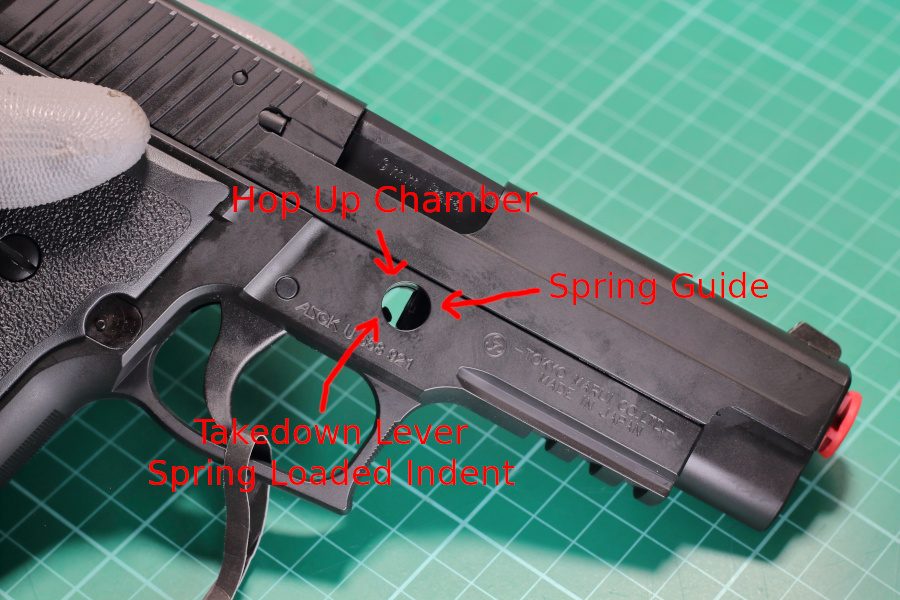
Sandwiching against the takedown lever is the recoil spring guide and hop up unit. I’m assuming that as the slide rides along the spring guide force is transmitted into the guide rod and into the takedown lever. The hop up unit also has most of the recoil transmitted into through the guide rod’s peg that it is attached to which looks to be redirected to the lower lugs and into the lower frame.
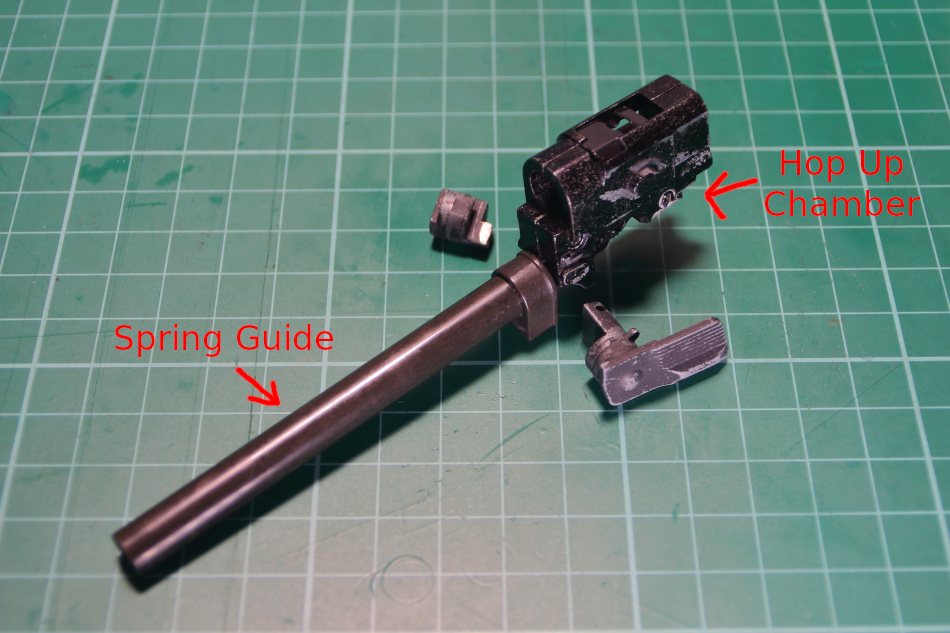
Nonetheless the takedown lever remains a contact point as shown here and still receives some of the impact. Now the way it is positioned is perfect for breaking. Think of a martial arts practicing breaking tiles. The edges are supported by spacers that leave spaces between each plate or board. Once struck at the center where the martial artist strikes, they break. In this case, the F226 lower frame acts as the spacers while the spring guide and hop unit transmit the strikes.
Clones Vs Variants
From what I have observed from looking at inventory in the stores in my area, and the available aftermarket support, the SIG P226 model is an established gas blow back pistol platform in the airsoft world. Judging from the aftermarket parts that I had seen at my local shops, it may fall behind the 1911/Hi-Capa and Glock variants, but the P226 platform has enough aftermarket support to remedy most servicing problems. At least this is true for the Tokyo Marui brand and its clones.
What about not so direct copies? In this case my 226 is a WE Tech F226 and it isn’t a direct clone. Instead, I would consider it a variant. From my observation, variants share similarities in design, but parts between them won’t necessarily be interchangeable. This is troublesome because I noticed that clones have that luxury of access to a wider array of spare parts while variants will face limitations in what they can find that works.
For more on the P226 platform please check out my gallery on the Hobby & Tech Warrior home page or the gallery above.
Working on this fix however, revealed that despite variants not being exact clones, some parts available for the 226 lines share identical or very similar dimensions. This finding means that these same parts offers either a direct fit replacement for variants as well, or hope that with a bit of alterations, a repair could be possible.
Lower Frame Indents
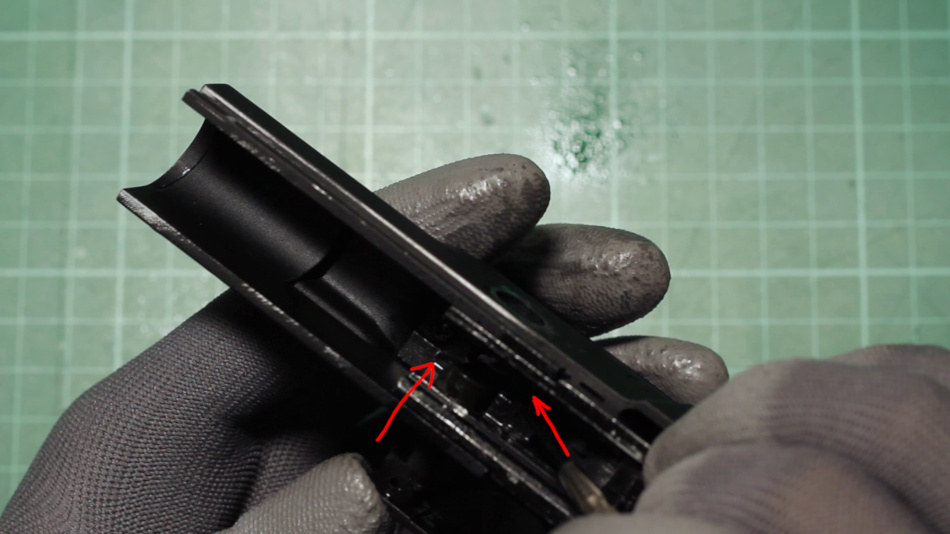
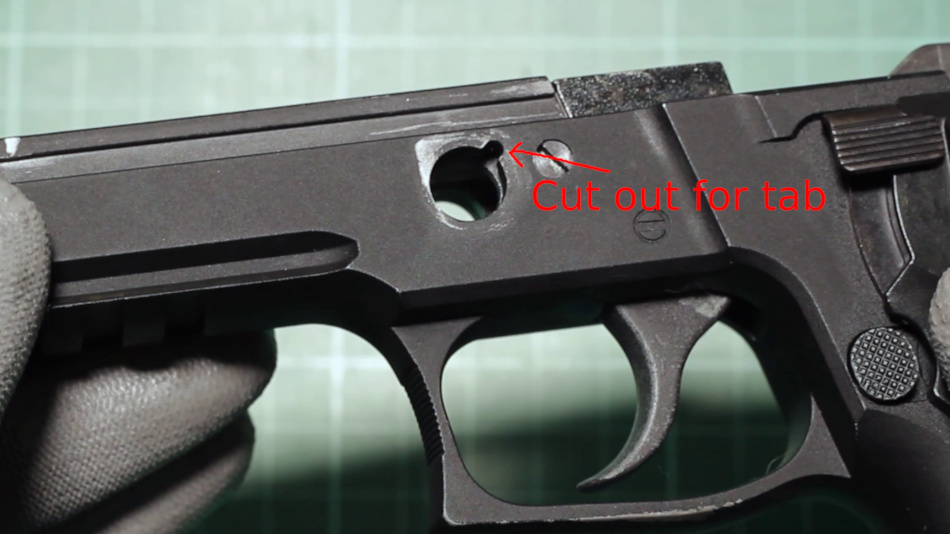
Taking a look at the lower frame, I noticed a spring loaded indent here. I’ve always wondered what it was, and as it turns out it acts as sort of a peg that secures the takedown lever. Being spring loaded, I was able to move it using a properly sized flat head screw driver. This moved it in and out of view of the cutout on the frame where the takedown lever slides in.
Takedown lever retainer indent is visible in the WE Tech F226 lower frame cut out. 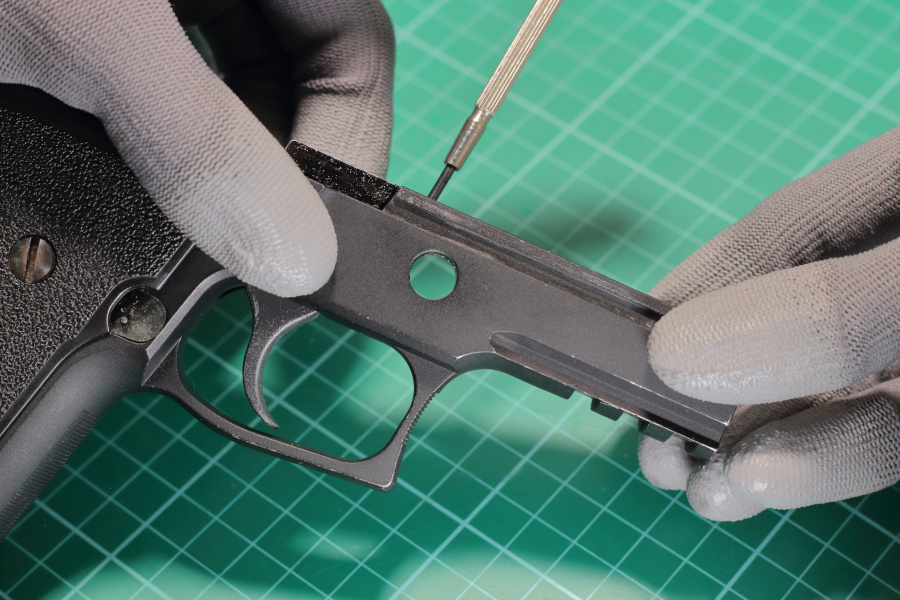
Takedown lever retainer indent pushed out of the way on WE Tech F226.
I also checked out the Tokyo Marui P226 that I owned to see what the takedown lever retainer indent on theirs looked like. For the most part, very similar. The Tokyo Marui one looked a little more robust. It also had more travel which lead me to believe that it would be easier for the takedown lever on the Tokyo Marui version to go in and out. However, despite the differences on the WE Tech F226 takedown lever retainer indent, the insertion of the takedown lever was smooth and was not more difficult, so in essence they are comparable.

For Reference: Tokyo Marui P226 lower frame takedown lever retainer indent. 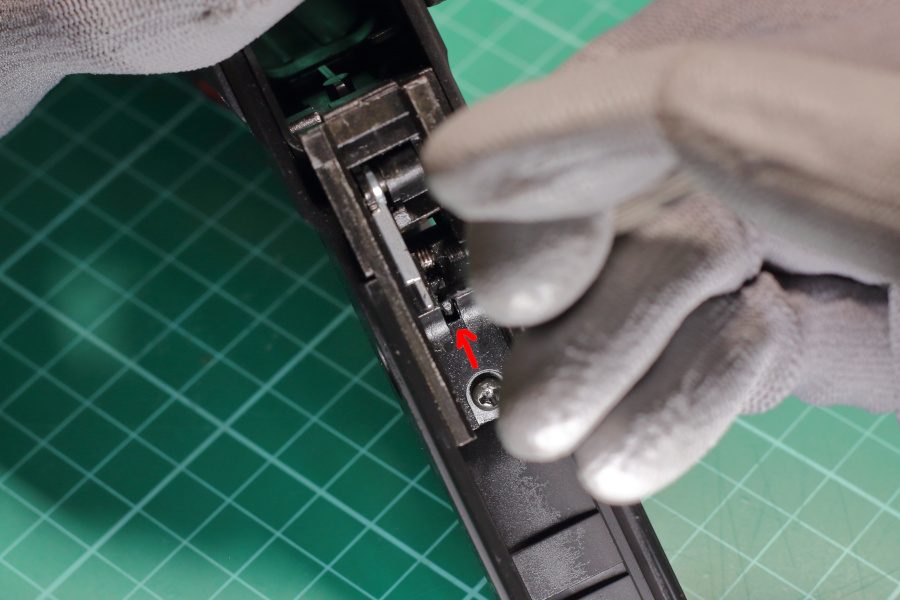
For Reference: Tokyo Marui P226 lower frame with takedown lever retainer indent pushed in.
The take down lever’s shaft has a cut out where this indent locks into, once they meet. For both systems, you would need to keep this part in mind to do a proper install or disassembly of the takedown lever.
Takedown Lever Install
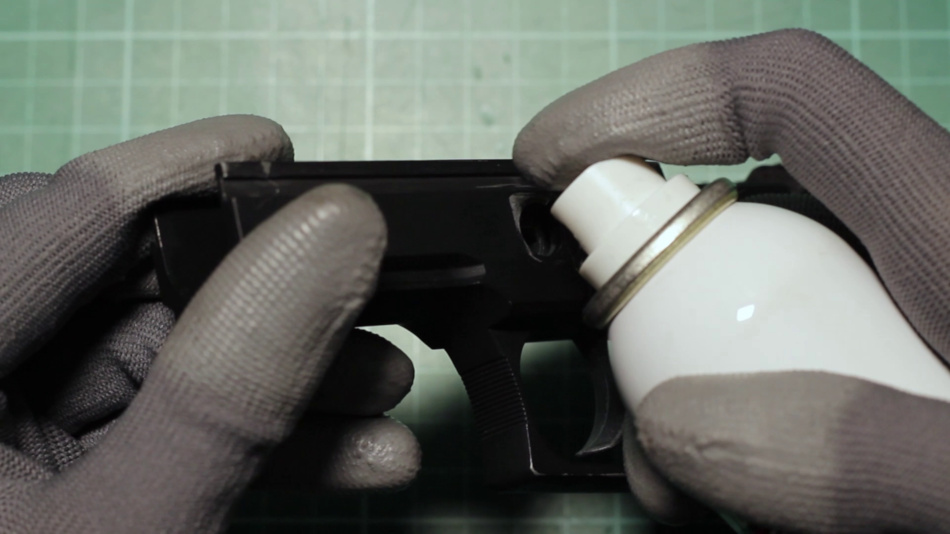
For the installation of the takedown lever, I started out by spraying the part of the lower frame where the take down lever will slot into, and the replacement lever shaft as well. This provides them with a protective film against abrasion and scratching. With most mechanical related parts, the process of applying lubrication helps reduce the effects of wear and tear.
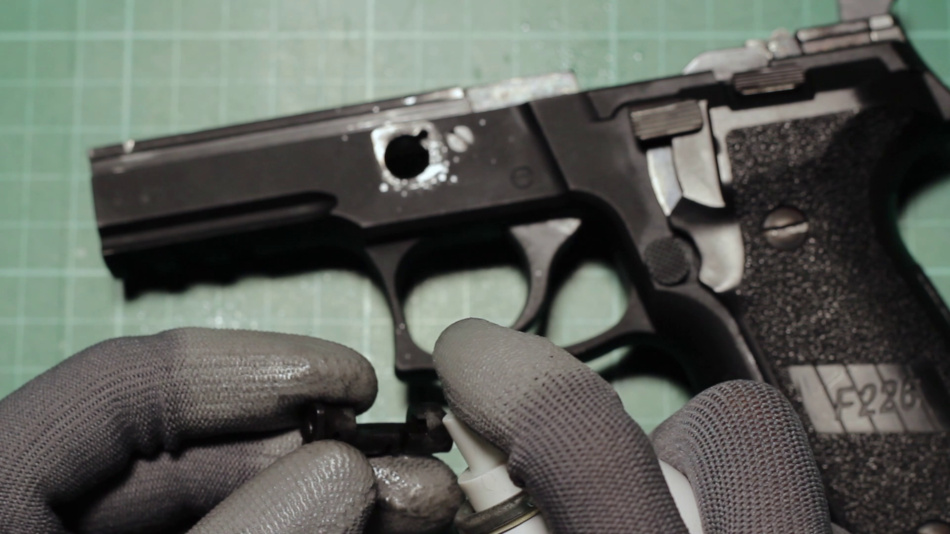
Next I thread the shaft of the takedown lever into the lower frame, taking note of the pattern cut out that corresponds to the tab found on the takedown lever’s shaft. It’s like a puzzle and only goes in one way.
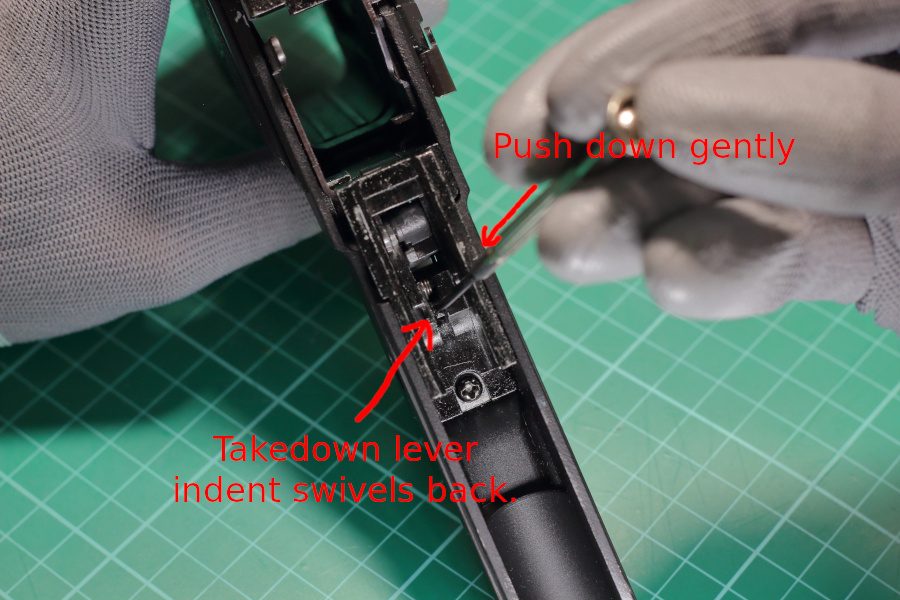
Stop against the takedown lever retaining indent, and with a tool press down gently and clear the indent, so that the shaft of the takedown lever can go all the way through.
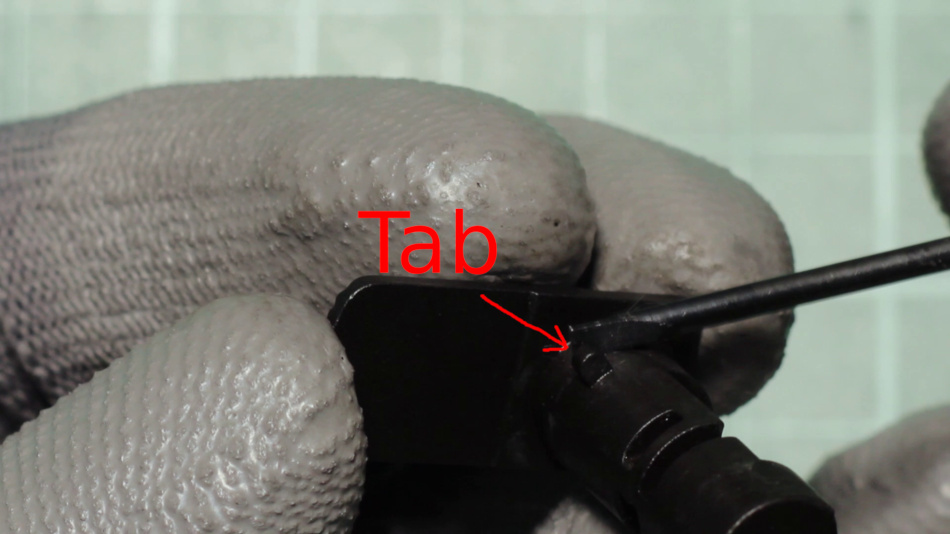
You can actually release the takedown lever indent once the shaft of the takedown lever passes it, and just wiggle the lever in all the way, but you have to keep in mind the tab on the takedown lever’s shaft, which needs to pass through the frame. Try and keep it straight so that it goes all the way through to the other side of the frame as well.
Personally I like to keep the takedown lever indent depressed, as I thread the takedown lever’s shaft through the frame. There’s less resistance that way, but doing it in a manner that’s more comfortable for yourself will work as well.
Thoughts
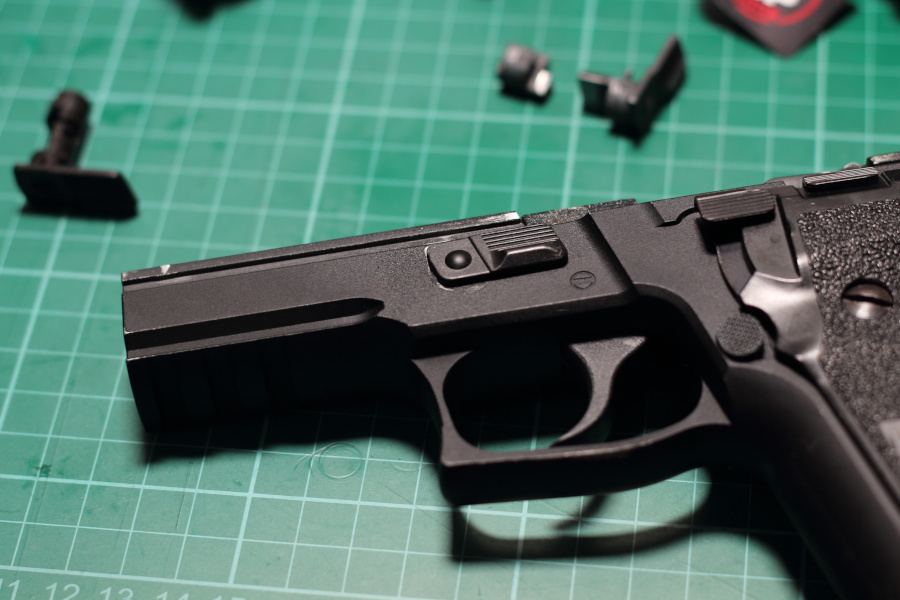
If you’ve followed the instructions above or at least used the photos for reference, you should be able to install the replacement takedown lever, just like I did.
Try actuating the lever to see if everything is in working order, and take a look at the WE Tech F226 fully assembled. The color of the Guarder take down lever actually better matches the shade of the rest of the controls. The original was too gray and light whereas this is a proper rustic black look.
I also did some further testing and tried interchanging the takedown lever on the Tokyo Marui P226 onto the WE Tech F226 to see if it would fit.
The differences between the takedown levers can be seen here.
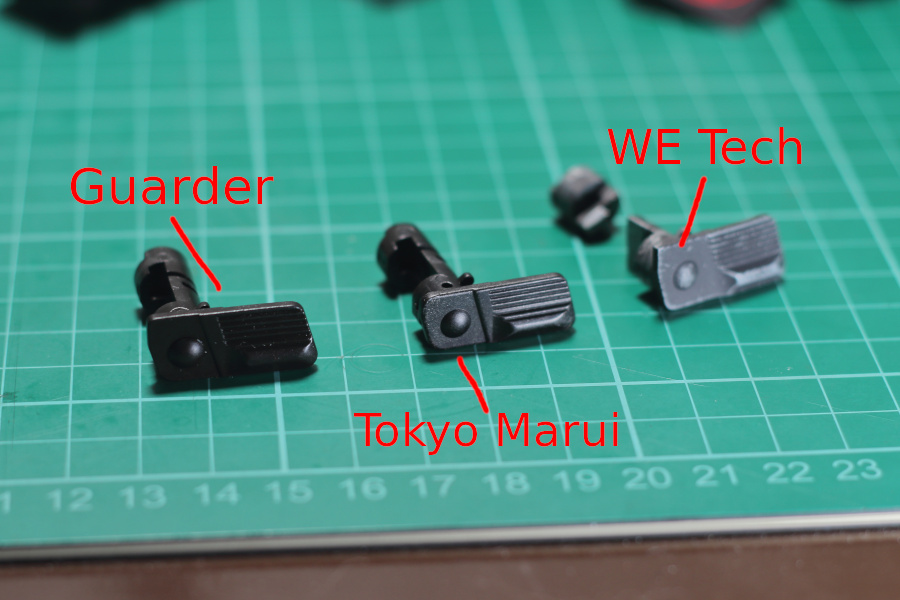
The Tokyo Marui has a smaller face profile as compared to the Guarder and WE Tech. The WE Tech has the largest face of the three, and the Guarder is somewhere in between. Color wise the Guarder is more similar to the Tokyo Marui.
I initially thought that the dimensions were the same between the Guarder and Tokyo Marui, but upon installing the Tokyo Marui takedown lever on the WE Tech F226 lower frame, I noticed a difference. Actuating the takedown lever, the Guarder is smoother to turn. It’s loose in a sense that it is smooth, whereas the Tokyo Marui take down lever on a WE Tech F226 lower frame is a little gritty and tight. However, it does fit and operate.
With this in mind, it is most likely that the WE Tech F226 takedown lever would have similar enough dimensions to work on a Tokyo Marui frame. Unfortunately, mine is broken so I’m not 100% positive, but it is likely true. For me this confirms the idea that, indeed, despite not being exact clones and not having as wide of a support in the aftermarket, variants are still valid options to consider. There exists key parts that are outright interchangeable, or otherwise, require just a bit of modification to keep them in operational order. It may be a bit more work than a clone, but that’s totally fine with me.
– J4

Good day, i just want to ask where did you bought your recoil spring guide?
Tokyo Marui spec works. It is a Guarder steel spring guide I think. As for where to get it, it depends where stock is available I guess. Best to ask your local store to source it for you. Good luck!